Implementing Inter-Dependencies Validation using Intercepting Filter Design Pattern
When you dealing with inter-dependencies (or circular dependencies) rules between components, you can consider to use Intercepting Filter Design Pattern to solve your problems.
Background
“Can I have a life insurance product, with a base product X with some riders as a single package?”
Those were the words I heard during backlog grooming from our product owner as we talked about new product specifications. It sounded simple at a glance. But wait until he told us to validate those product combinations. Then you would hear lots of complex validations coming as your fit criteria between the base product and its riders. And most of the time, the product validations have inter-dependencies (or worse, circular dependencies) between one another. Then you realize that it is not simple at all.
I understand some of you probably do not work in the insurance industry. So I will give a brief explanation about life insurance products. As a disclaimer, I put an oversimplification about insurance products. The purpose is solely for this article only. Therefore we can put things into the same context. One more thing, if there is any similarity in the product name in the market, it is purely coincidental.
Insurance Product
Let’s start with insurance product.
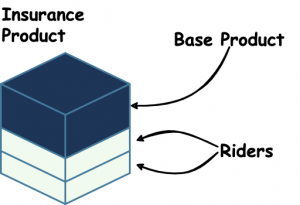
An insurance product (in this case, a life insurance product) has two major components. The first is the base product (or the main product) and the add-ons. We called the add-ons the riders (or risks for some companies).
If you have an insurance policy, you can look at it and find your main product and riders.
Business Rules
As I already mentioned in the background story, the business rules for insurance products can be pretty complex. Usually, you need to validate the rules within the base product or riders themselves. More often than not, you need to validate between one another as well. This validation will lead to inter-dependent and circular dependencies between the base product and the riders.
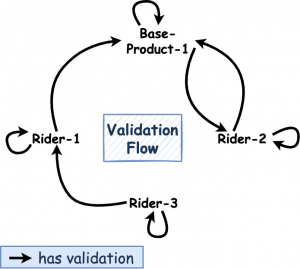
Note: this picture will be used as a reference to the use case.
Use Case
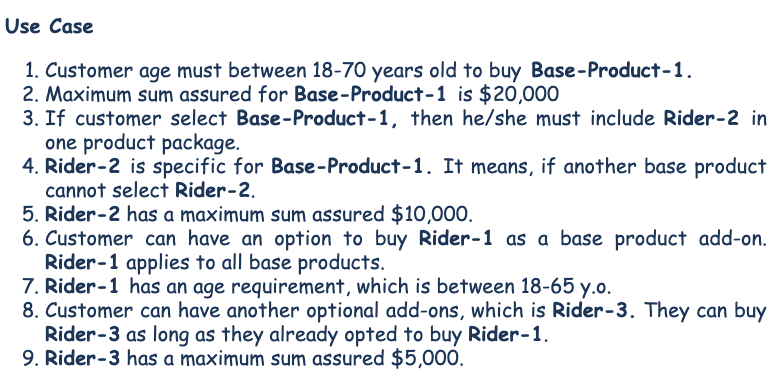
Now the product owner already gave you the product requirements. He gave you the specification as below:
Gherkin
As a good software engineer, we embraced testing as our first quality gateway. Therefore I believe we need to start translating the requirements into Gherkin’s style.
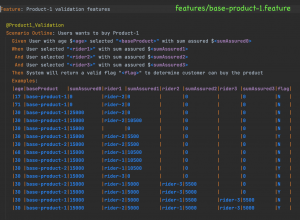
Test Scenario
The next step is to create a test scenario based on our Gherkin file.
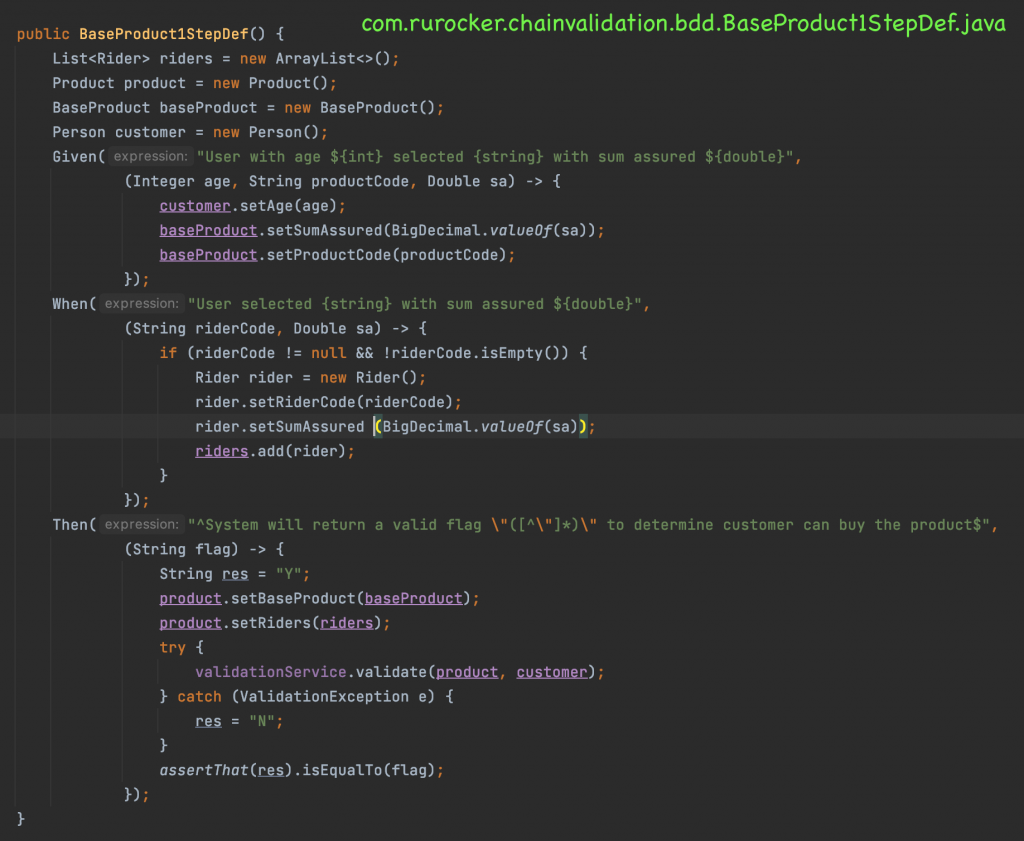
Of course, the test would break because we still did not implement anything.
Naive Approach
Practically, almost all coding challenges can be solved by conditional and looping (note: imperative programming). But how you implement using both combinations can produce different outputs. For instance, you can use this naive approach to fulfil the test scenario.
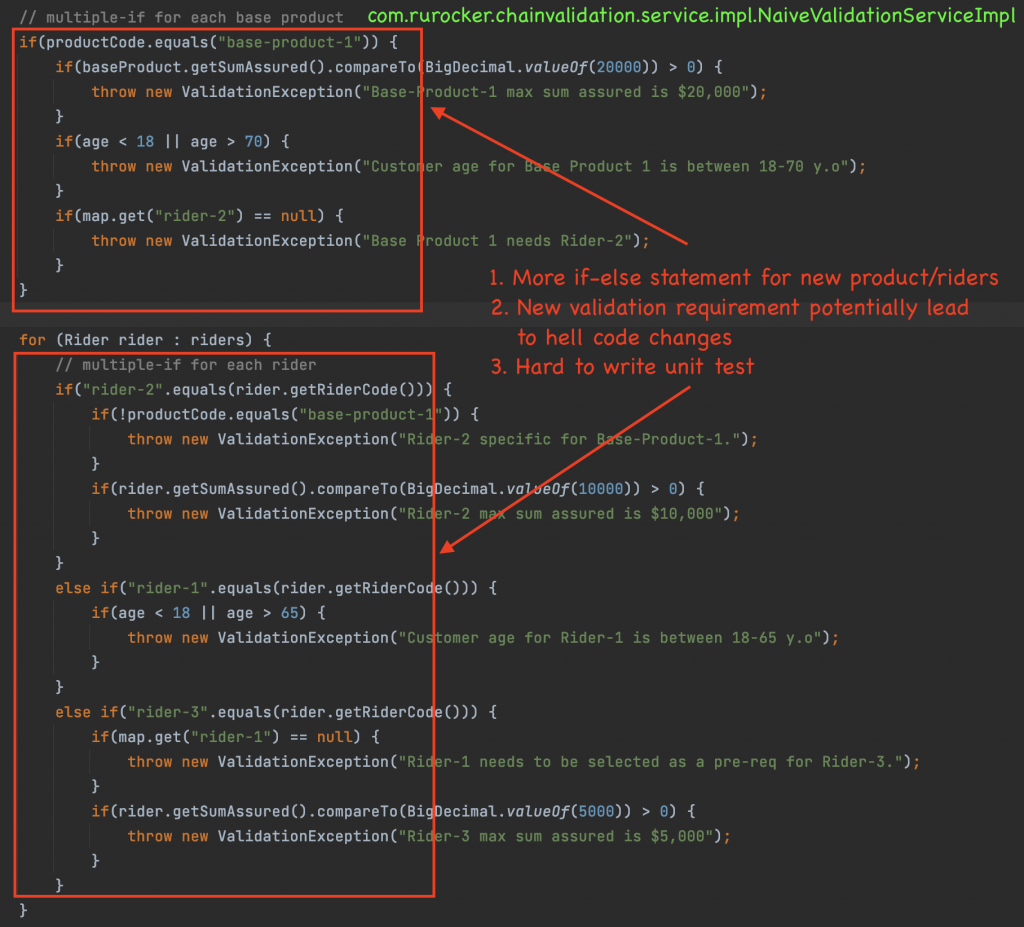
I am not saying this is wrong. It is not. Because if you run the test against this implementation, it will produce GREEN results. However, at least three issues are found here. First, imagine there are more and more products are coming, then you will have more and more if-else statements in your code. Second, what is going to happen if there are new validation requirements? Produce another nested if-else again all over the place. Third, a large number of if-else and nested-if in your code will make the unit test hard and exhausting. Well, I will say this code is unmaintainable at worst.
Chain Service using Intercepting Filter Design Pattern
The other way around, you can use design patterns to leverage the conditional and looping implementation for your good. In this case, I will select intercepting filter design pattern. This design pattern will treat every product validation as a pluggable component. Then every validation component will be processed in a standard way without requiring changes in the basic core validation itself.
Validation Context
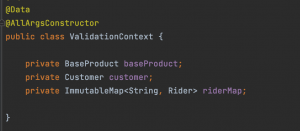
The first step is to create a validation context. The validation context acts as a value holder between inter-component interactions. Therefore we can retrieve, pass, or update the context for each component.
Validation Interface and Abstract Wrapper
We have our validation context in place. Next, we need to create an interface for component validation. We have two methods in this interface. The first is the validate method, which has ValidationContext as its parameter. The validate method is chained. We will call this method in each validation component and pass the ValidationContext. The second is the isActive method for feature toggle purposes.
We have another abstract class as a validation wrapper. The wrapper duties are to check whether the current validation component is active, retrieve the associate rider of the validation component from the hash map, and delegate the method call to the validation component.

Implement the Component Validation
Now we are going to the core of the business logic. It is the implementation of each business rule. The approach is, one validation is mapped to one component. So in our case, there will be eight validation components. For instance:
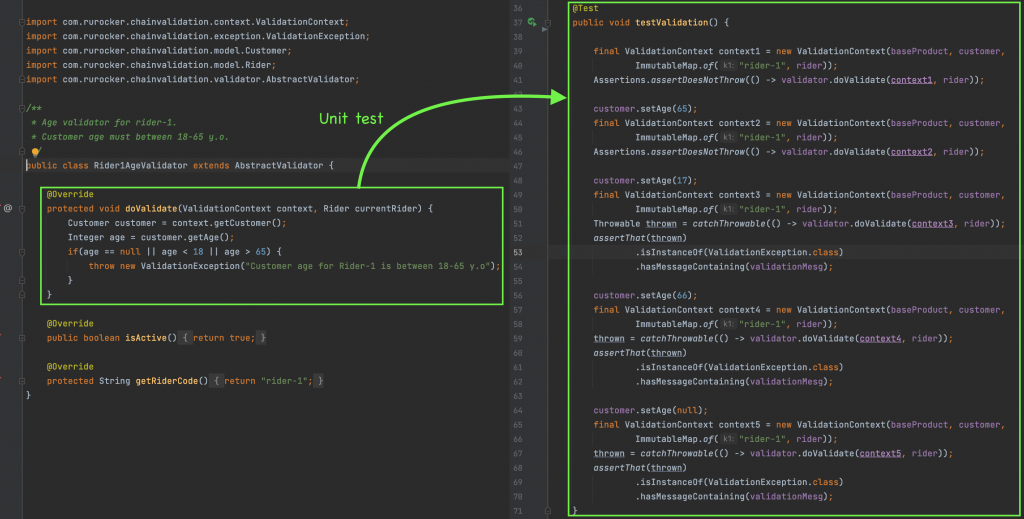
The best thing is, every component has a specific validation task. Therefore it is easy to create a unit test for component validation.
Validator Chain
After all validation components are ready, we will set up the chained call for each validation component. The ValidatorChain duty is to iterate between validation components then call the validate method.

Chain Service
The last step is to create a service itself; as an implementation of ValidationService. The service will construct a ValidationContext and then pass it to the ValidationChain.
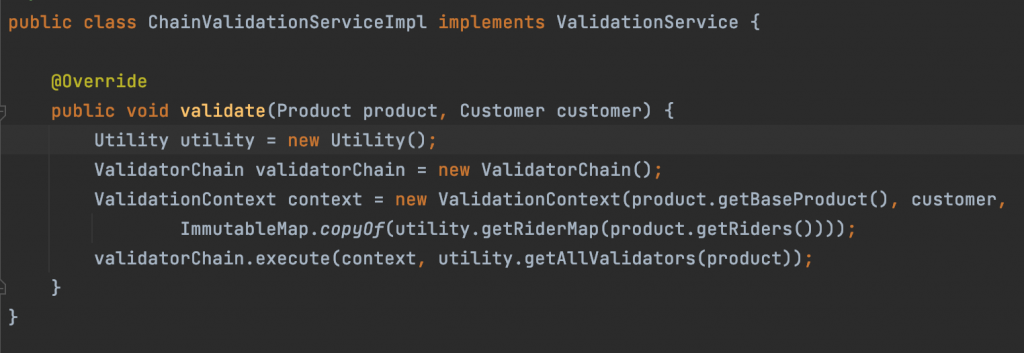
Note: I used a Utility class to handle some data retrieval.
Run the test scenario once again to validate the implementation fulfill the fit criteria.
Product Owner Announced a New Regulatory Changes!
 Well, that happens. New regulations imply new business rules. Let say there is a change in the age requirement for rider-1. The minimum age requirement is 20 years old. This change is applied to start 2022. Now, how can we handle this?
As you might guess in the naive implementation, we need to add another nested if-else statement in the existing yet dense logic branches. Remember, more nested if-else means more code complexity and harder to do a unit test.

Meanwhile, things are not too complicated in Intercepting Filter design pattern. Do you remember the feature toggle in the validation interface? Yes, just leverage that functionality. Implement another component validation for a new business rule, then activate the toggle based on the current date.
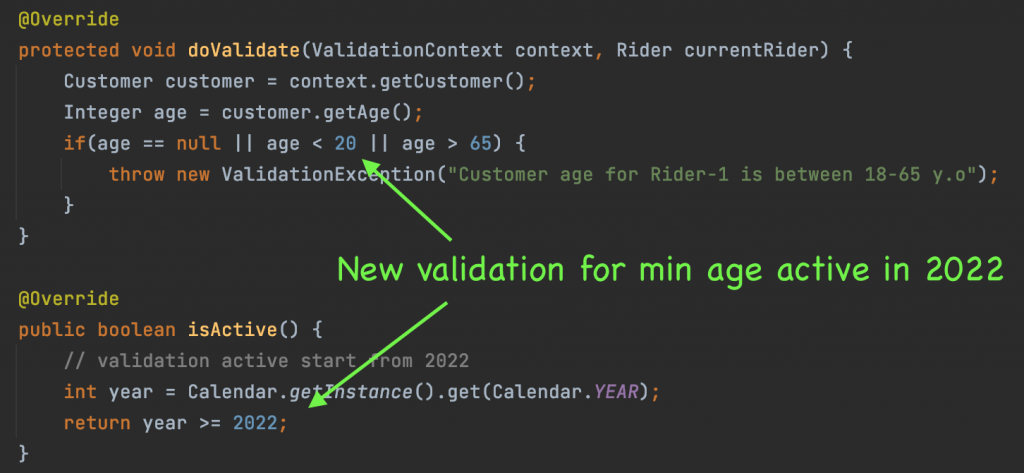
Now, which approach do you think is better yet safer with minimum code changes, maintainable code testing, and reducing merge conflicts? The Intercepting Filter design pattern is the winner for me. Now I can ship the code faster, safer, elegant, and less headache during merge conflicts in the process.
Conclusion
Whether you realize it or not, the Intercepting Filter design pattern affects your code writing. If you take a step back and look at your code, the design pattern makes your code follow the SOLID principle. Each component has its single responsibility. It is easy to implement the open-closed principle by using the feature toggle. Also, we use interfaces in our code and substitute them in the runtime. Probably only dependency injection is lacking in the codebase.
One more thing, we can use Intercepting Filter design pattern for another use case. For instance, still in the insurance industry, you can apply the design pattern to a product calculation. Or you find another use case that can fit into this design pattern. Anyhow, please be selective when you need to decide which design pattern you want to apply to your codebase. Choosing the right one for each use case is the key.
That’s all from me. If you are curious to know deeper, please check my code in the GitHub repository.
PS: I tried to provide a less framework-dependent solution. If you are looking for a ready-made business rules framework, you can look at Drools.