Securing Spring Boot REST API – CORS
Introduction
In today’s IT architecture world, most of the web applications are invoking REST API to interact with backend system. So if you have experiences on developing a web application using Javascript, or XHR precisely, and you are dealing with REST API in the backend, most likely you will find something call Cross Origin Resource Sharing or CORS.
CORS
Cross-origin resource sharing (CORS) is a mechanism that allows restricted resources (e.g. fonts) on a web page to be requested from another domain outside the domain from which the resource originated.¹
Basically, whenever you make an HTTP request, browsers will allow your request within the same origin or host. Let say your script in domain www.ru-rocker.com and your REST API is located in the same host, you will find no issue when invoking the API.
However, whenever you try to access REST API from different host, most likely your browser will make a pre-flight request to validate whenever your scripts are allowed to make cross-domain request.
The Cross-Origin Resource Sharing (CORS) mechanism gives web servers cross-domain access controls, which enable secure cross-domain data transfers.²
Use Case
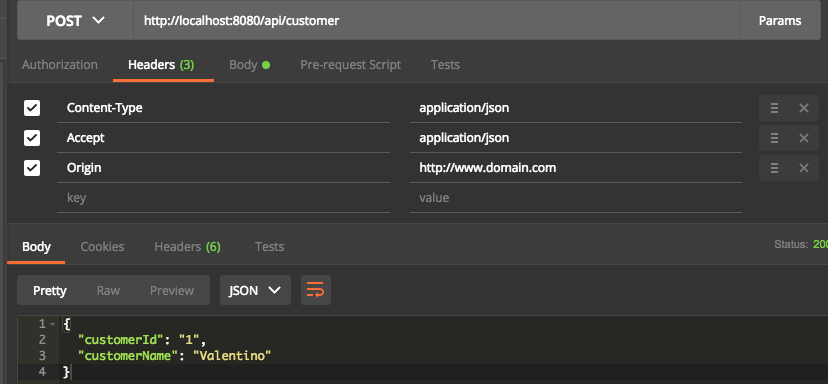
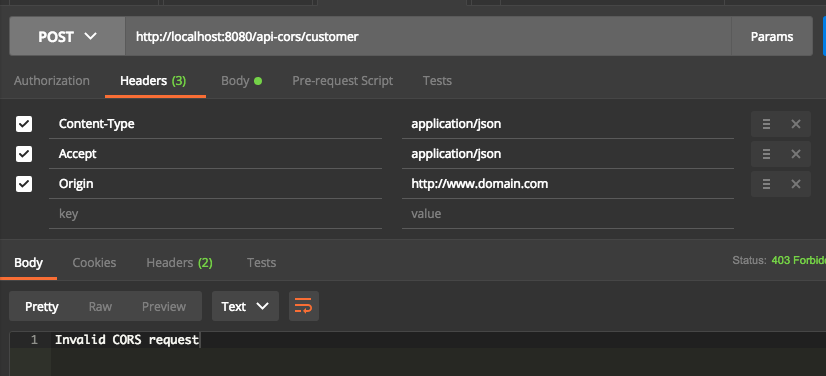
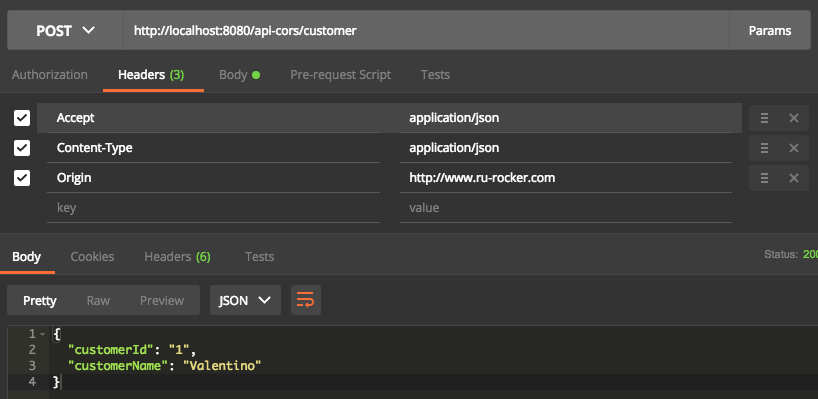
I will implement REST API with two different context paths. First context is /api/ , which allows all cross-origin request. The second one is /api-cors/, which allows request from domain www.ru-rocker.com.
For these use cases, I will implement using Spring Boot Starter Web. All the source code for this how-to are available on my github.
Setup Spring with CORS
Spring Boot Starter Web
Basically, spring-boot-starter-web comes with allow all origin (HTTP headers: Access-Control-Allow-Origin: *). But it is not good because we need to restrict only specific host that are allowed to access our API. Therefore we need to add another configuration to restrict domain access.
Configuration
Since spring-boot-starter-web allows all origin, therefore the first use case is automatically solve by itself. You can see in the CustomerController class for more details.
The other one is for the second use case. The controller class for this sample is OtherCustomerController class. You will see no difference in configuration between CustomerController and OtherCustomerController, unless the RequestMapping annotation. This annotation will determine our configuration in the CORS Configuration class. Remember, our purpose is to allow /api-cors/ path accessible only from https://www.ru-rocker.com origin.
CorsConfig
To apply global CORS Configuration for our REST API, we create a WebMvcConfigurer bean and put our CORS configuration under addCorsMapping method.
|
1 2 3 4 5 6 7 8 9 10 11 12 13 14 |
@Configuration public class CorsConfig { @Bean public WebMvcConfigurer corsConfigurer() { return new WebMvcConfigurerAdapter() { @Override public void addCorsMappings(CorsRegistry registry) { registry.addMapping("/api-cors/**") .allowedOrigins("https://www.ru-rocker.com"); } }; } } |
Note: you can use @CrossOrigin(origins = "https://www.ru-rocker.com") in each controller. However, it is better to apply in a global configuration.
Testing
Start the REST API by running main method under SpringSecurityDemoApplication class. Then try the API by using REST console tools, such as Postman or SOAP UI.


Conclusion
Now we can protect your API by white listing domain that control access to external domain. And by using Spring, the set up is very simple because all you need is three lines only. Just remember to configure the domain origin whenever you are developing REST API in order to make your API more secure.
Have a blessed day and happy new year!